

How To Remove Skateboard Grip Tape
Be it for commuting in a busy urban wasteland or surfing the sidewalk at your local park, electric skateboard has slowly evolved from the higher lab to the internet market place identify. Now is a slap-up time to play with alternative forms of transportation for fun and freedom to explore your world in new ways.
If you are looking to purchase your new mode of transportation, in that location are a ton of expert sites to find a gear up to ride an electrical skateboard. You tin can visit Lacroixboards.com, Backfireboardsusa.com, Meepoboard.com, Wowgoboard.com or even Amazon.com to find any number of boards to adapt your needs and budget.
This commodity is meant for the adventurous tinkerer who enjoys getting into the guts of a project, the studious experimenter, or even the old schoolhouse skater or landlocked surfer looking to renew their dear of the ride. And then let's bound into it, in the electrical skateboard DIY guide.
Which Kind of Electric Skateboard to Build?
This is important, as there are a few different styles of an electric skateboard.
Urban Electric Skateboard
This fashion of a skateboard is mostly converted old schoolhouse decks, penny boards, or shorter longboards with big street wheels, inflatable wheels, or solid airless AT wheels with street treads. Well-nigh utilize hub motor, single or dual belt drives, or even direct drives like the Revel kit. These smaller boards are used a lot on college campuses, and equally commuters for work. Proficient stable boards with modest speeds and great range. They don't have up a lot of infinite and are easy to conduct.
Electrical Street Skateboard
Feeling adventurous? Street eboards are fabricated from standard longboards, smaller downhill boards, and AT boards using urethane street wheels. These tend to exist faster boards with wider trucks for higher speed stability and sliding fun. These boards will feature dual belt drives, straight bulldoze, or even gear drive. They feature high-speed motors and very streamlined setups. Rides like these can be a niggling tricky for inexperienced or new skateboarders. Surfers accept even put special ride plates on these boards to recreate the surf carving experience when cruising around town.
Electric AT (All-Terrain) Board
These are mountain board mode skateboards with large inflatable knobby tires, fully suspended trucks, huge elevation-mounted battery packs, and fully enclosed ESCs, with dual motor or even 4wd motors. These motors are normally loftier torque belt driven, chain driven, or even gear to gear bulldoze trains. Some of these beasts come with bindings to continue your feet in place if you plan on communicable a ton of air. These boards are incredibly powerful with huge amounts of torque all designed to become you up and down the mountain every bit fast and as fun equally possible.
Electric Downhill/Uphill Racer
That's right I said racer. These boards Fly. The men and women who ride these boards do then wearing full leather motorcycle gear and helmets. These boards race higher up 50 – 60 mph and are beingness pushed even faster. These riders race upwards and downward some of the scariest canyons in the west. These boards feature the best and fastest motors, batteries, and ESCs the industry currently offers. Only the nearly experienced riders should attempt to tame these ponies.
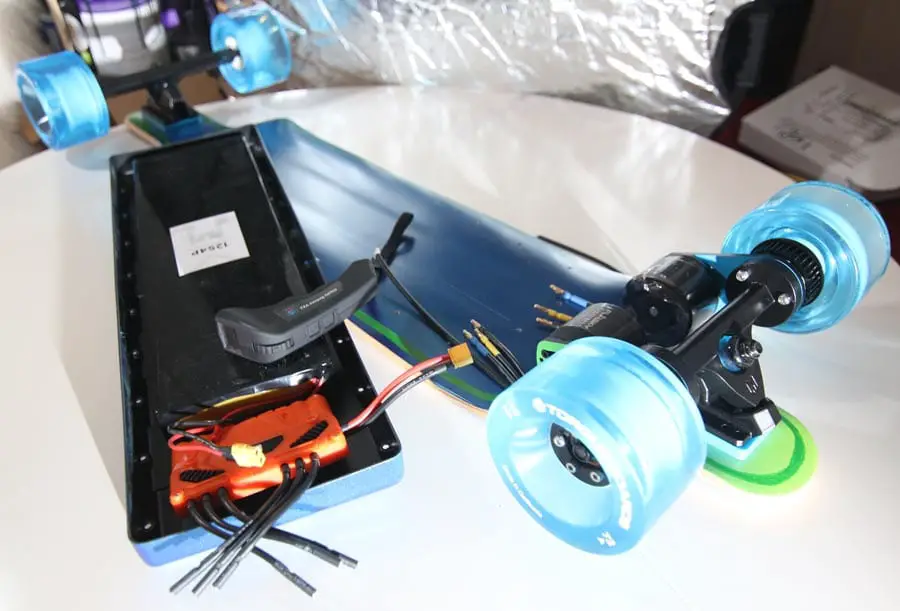
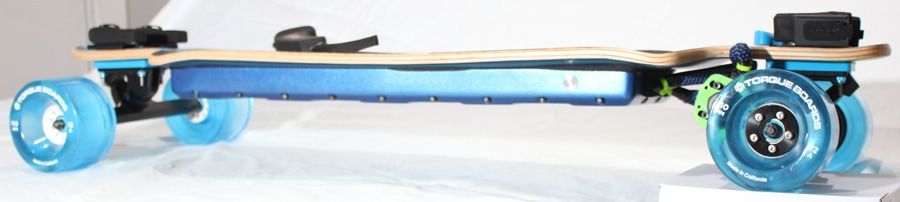
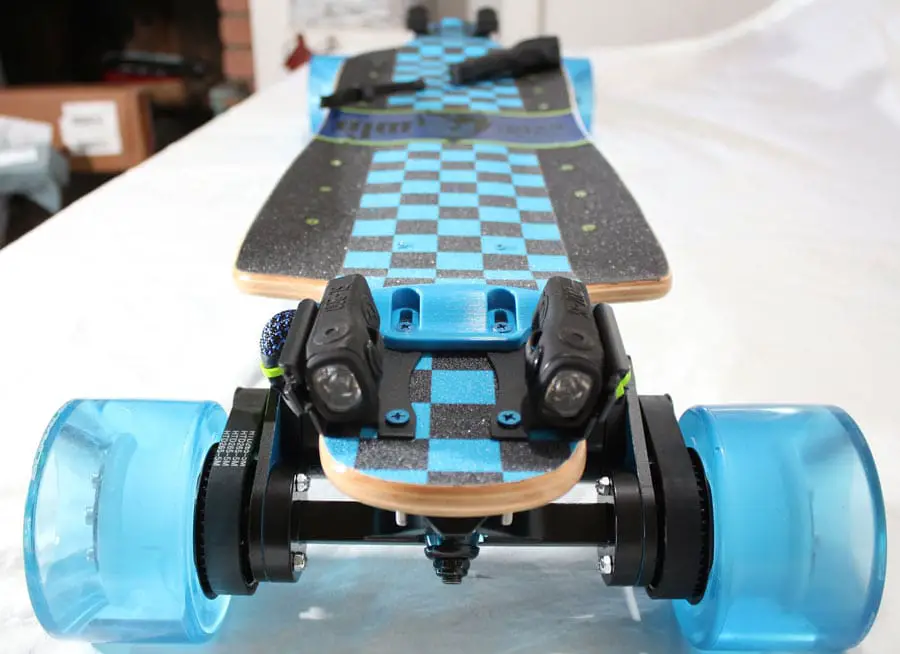
For the purpose of this article, nosotros are going to build a Dual Belt-Drive Street Board.
Hither is the Electric Skateboard DIY Parts list:
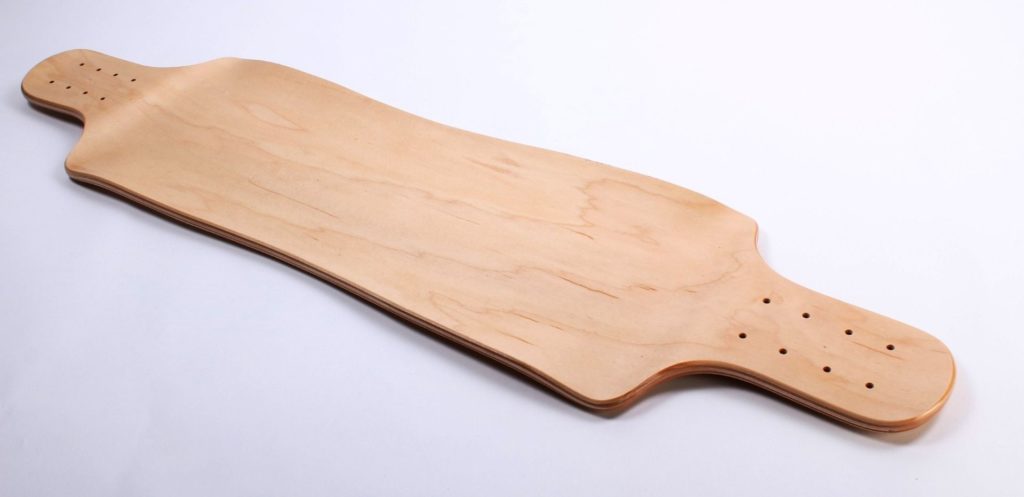
- Deck:
Longboard Skateboard deck. 41 inches top mount. This deck is a 9ply maple deck institute at skateshred.com along with a ton of other not bad choices. Choose a board with at least a 31" wheelbase between the trucks. Check out our guide on electric skateboard decks for more info on eskate deck styles and choices.
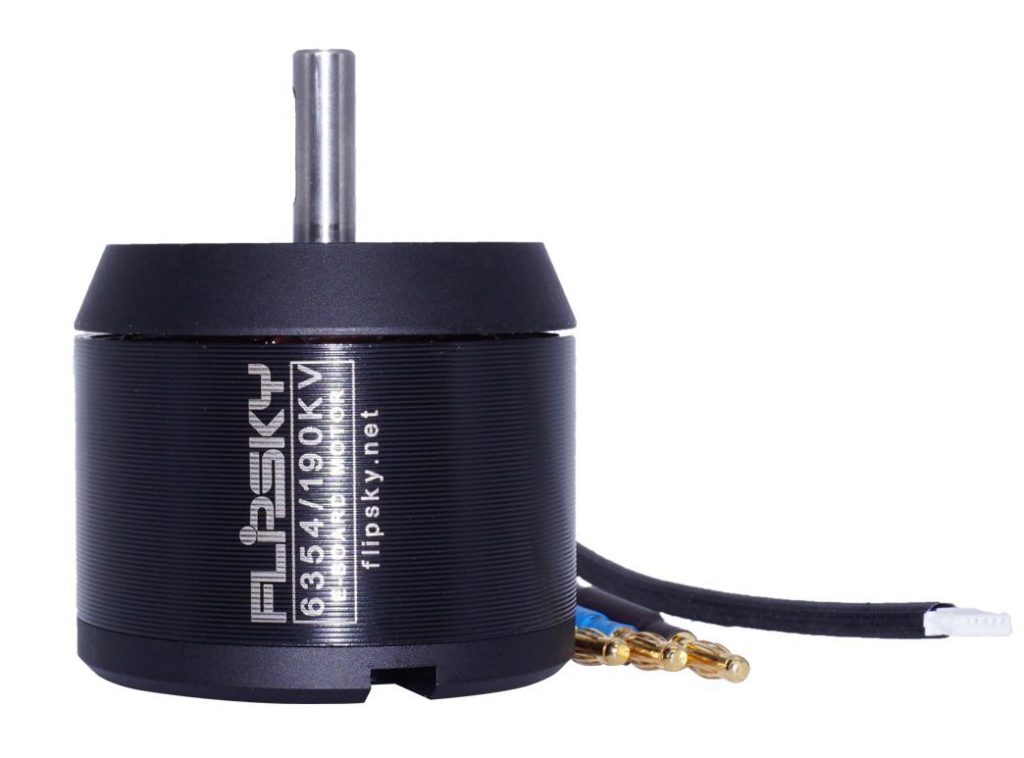
- Motors:
6354 190kv battle-hardened Flipsky brushless motors (flipsky.internet). You tin besides go to the larger 6384 or 6394 size motors. If yous would like to learn more, check out our guide on electrical skateboard motors.
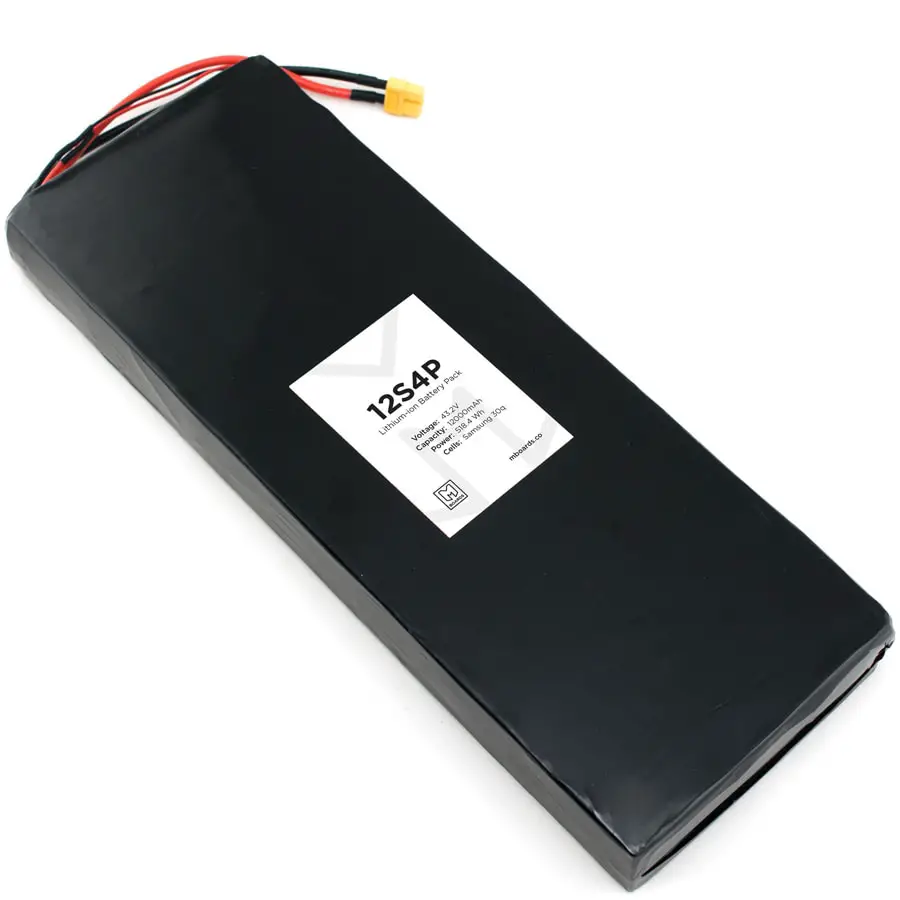
- Battery:
Loftier ability 12S4P Bombardment. This battery is congenital by the people at Mboards (mboards.co). It includes a matching battery charger and has a pre-soldered XT60 connexion. The most expensive part of your build without a doubt is your batteries; choose wisely. In that location is a ton of high ability in these very small packages. If you buy, choose a reputable vendor or habitation builder/rider who comes on a rock-solid recommendation. You can also try your own manus at edifice. Improperly built, they can start fires. Much circumspection is urged when connecting batteries. Check out our guide on electric skateboard batteries to larn more near the most important part of your ride.
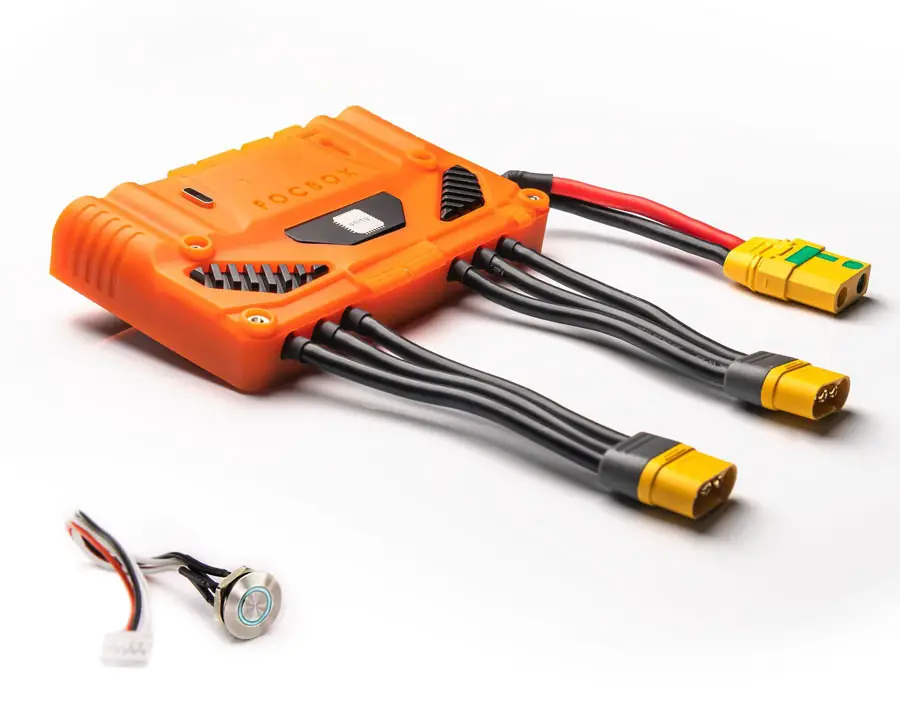
- ESC (Electronic Speed Controller)
FocBox Unity Dual electric speed controller. This unit includes built-in Bluetooth and has a built-in piece of cake setup or you lot can dive into the VESC programming depending on your skill set up. You tin detect the Unity at multiple online retailers. Other slap-up ESCs are the Flipsky vi.6Plus Dual FESC (flipsky.internet), Stormcore Dual ESC (lacroixboards.com), or the BKB Zenith by Build Kit Boards (buildkitboards.com). If your ESC doesn't have congenital-in Bluetooth, purchase a Bluetooth adapter. Programming your ESC is way easier using your smartphone or not being plugged into your laptop.
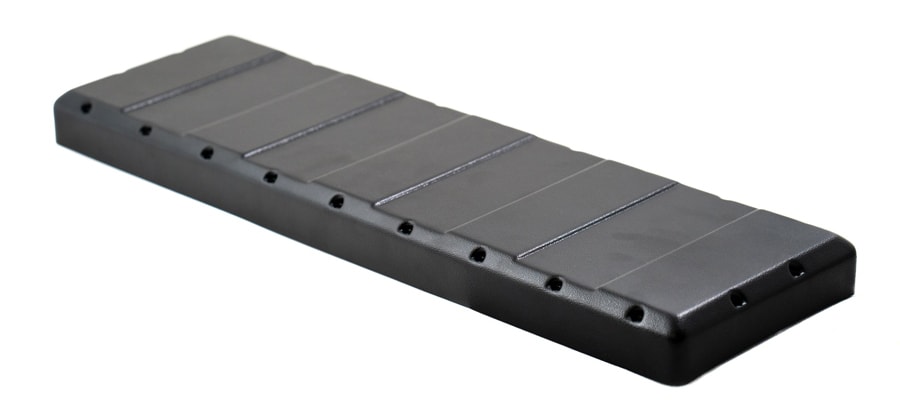
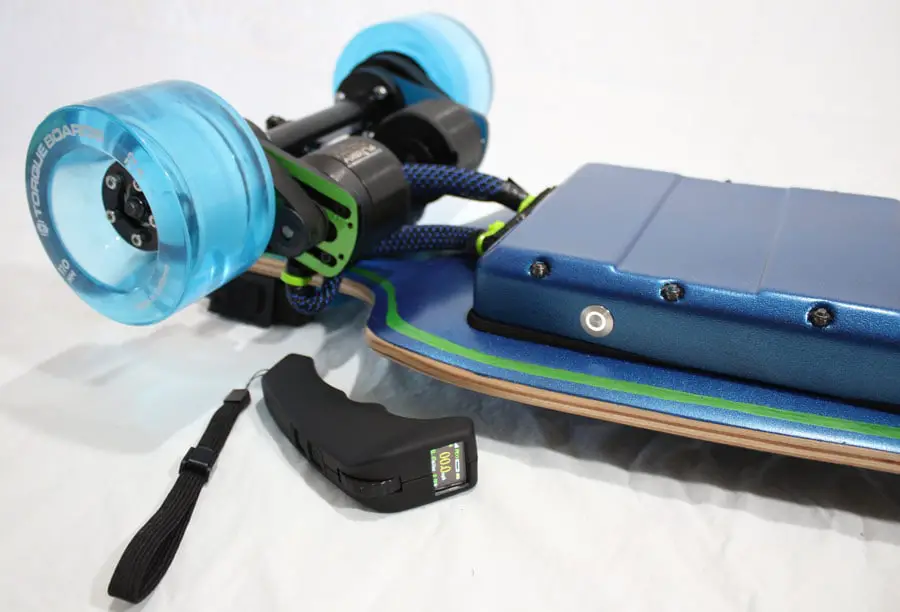
- Battery and ESC enclosure:
For this build, we will be using the new and much improved Forty enclosure from MBoards. This enclosure comes with its mounting bolts and precut gasket seal to assistance keep out moisture and clay.If your enclosure doesn't take its own mounting system, use six – 1 ½ inch 10×32 mounting bolts at least. Too many bolts, or besides stiff of an enclosure and you volition affect your ride, or mayhap crack the enclosure and damage the electronics.
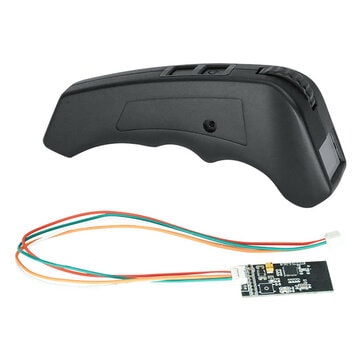
- Remote command:
For this build, the VX2 from Flipsky meets the need. The rugged Flipsky remotes can take some damage and the VX2 features onboard telemetry and speedo when connected properly. The cheaper VX1 is an oft copied manufacture standard and also works great. Hoyt Skate makes a slap-up one shaped like a hockey puck that fits in the palm of your hand. Whatsoever remote you choose, there are a lot of options out there for y'all as long as you have the receiver and a uniform port on your ESC.
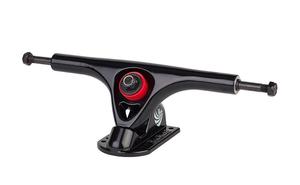
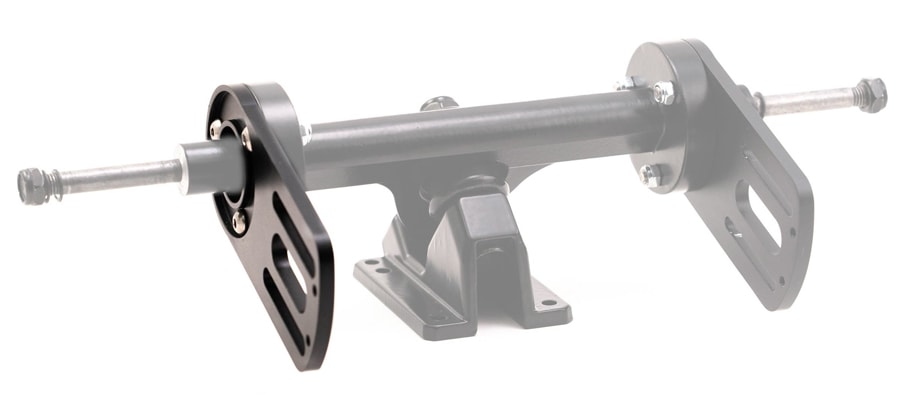
- Trucks:
Skateboard trucks. Style depends on how you plan to ride. Check out our guide on electric skateboard trucks for more info. The trucks for this build will be super-broad, reverse kingpin, caliber style trucks.
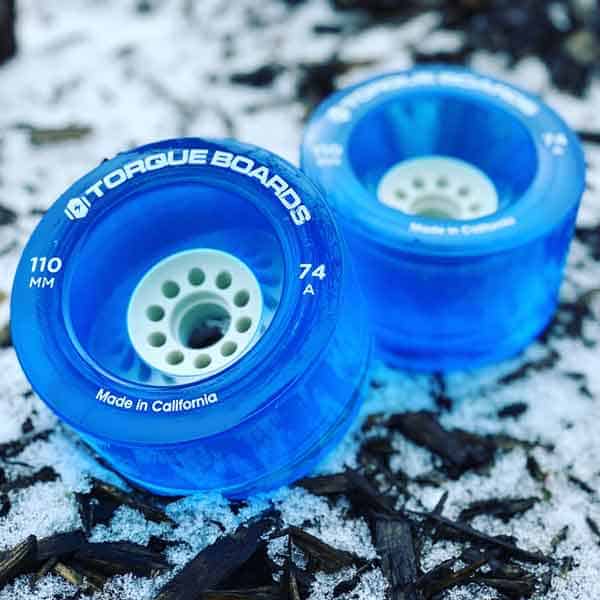
- Wheels:
Torqueboards 110mm urethane 79 Duro skate wheels with kegel hub and adapter found at (diyelectricskateboard.com) . At that place are so many, many other styles of wheels sold by so many, many unlike companies. Check out our guide on electric skateboard wheels for more info on this growing section of electric skateboarding.
- Bearings:
Bones Reds bike bearings. Since I also "analog" skateboard, these are a personal choice. In that location are many brands out there. These can be a crucial part of your ride depending on your surroundings, check out our guide on electric skateboard bearings to learn more about skateboard bearings.

- Pulleys and belts:
Belt length will depend on your build. For this build, we will be using a 36 tooth Kegel pulley and an 18 tooth 8mm Vanpro drive pulley on the motor. The belt size should be around 375mm for this setup. Get to diyelectricskateboard.com, mboards.co, or the vbeltguys.com to society belts.
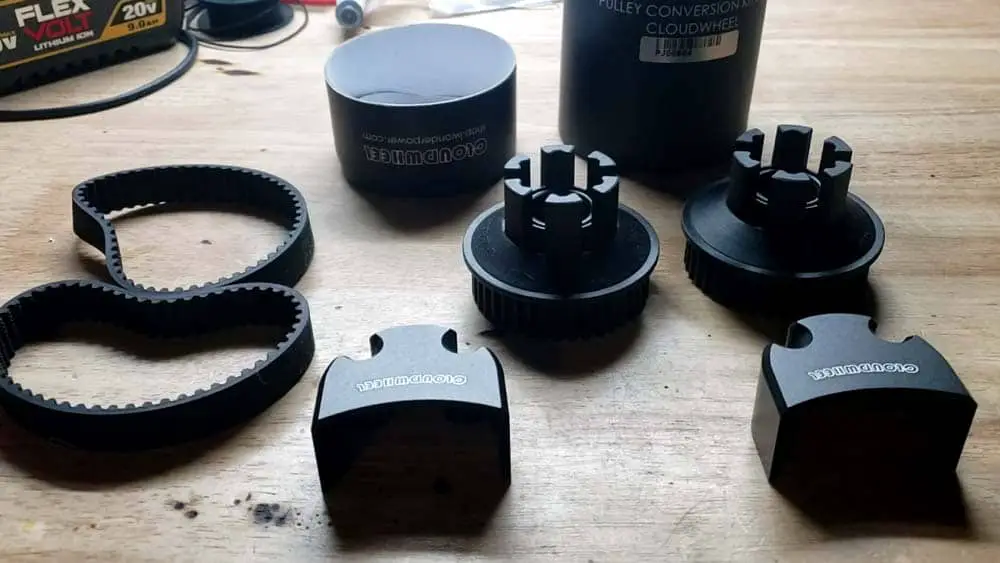
- Motor mounting plates:
Mounting Plates for motors. The Mboards mounts existence used are hands adjustable to aid with caster tension and feature a mounting system that doesn't slip. In that location are a ton of options out at that place. Other peachy options include mounts from Flipsky, colored anodized sets from Torqueboards, Sturdy versions from BKB.com, or popular brands such as Evolve. You tin can also make your own from any clamper of metallic you tin work with your hands or CNC mill.
- Mounting bolts:
10×32 1.5in Mounting bolts for the trucks. Use longer bolts, 2 to iii inches, if you lot intend to apply lights similar Shredlights. I prefer to employ stainless steel bolts from the local hardware store as they don't rust. If you feel creative you tin can paint the heads.
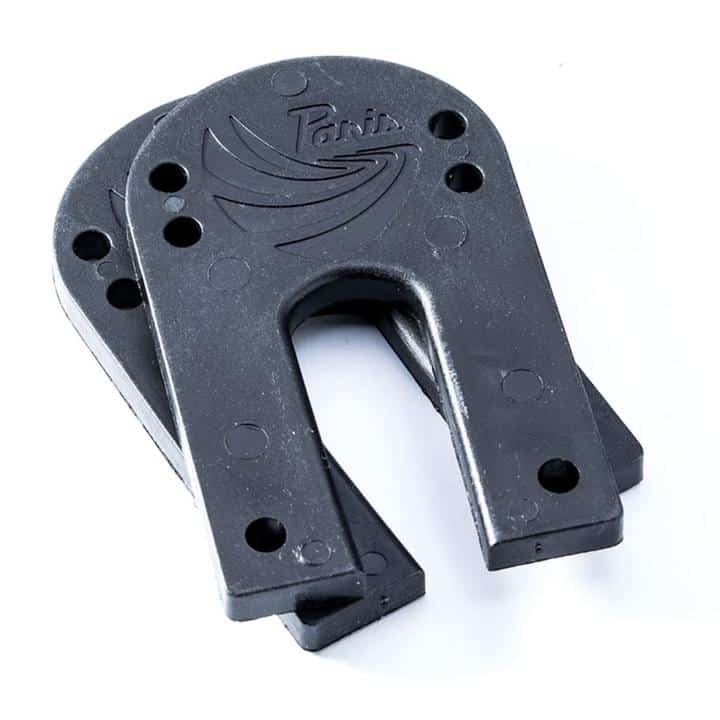
- Riser Pads:
½ inch Riser pads. 1/4inch high is a minimum to help preclude bicycle bite with ½ inch being the ideal. If you are building AT setups you will Need wedge risers. Use safe for more than shock assimilation. Pads can too be 3D printed in PETG. The pads in this build are 3D Printed using PETG.
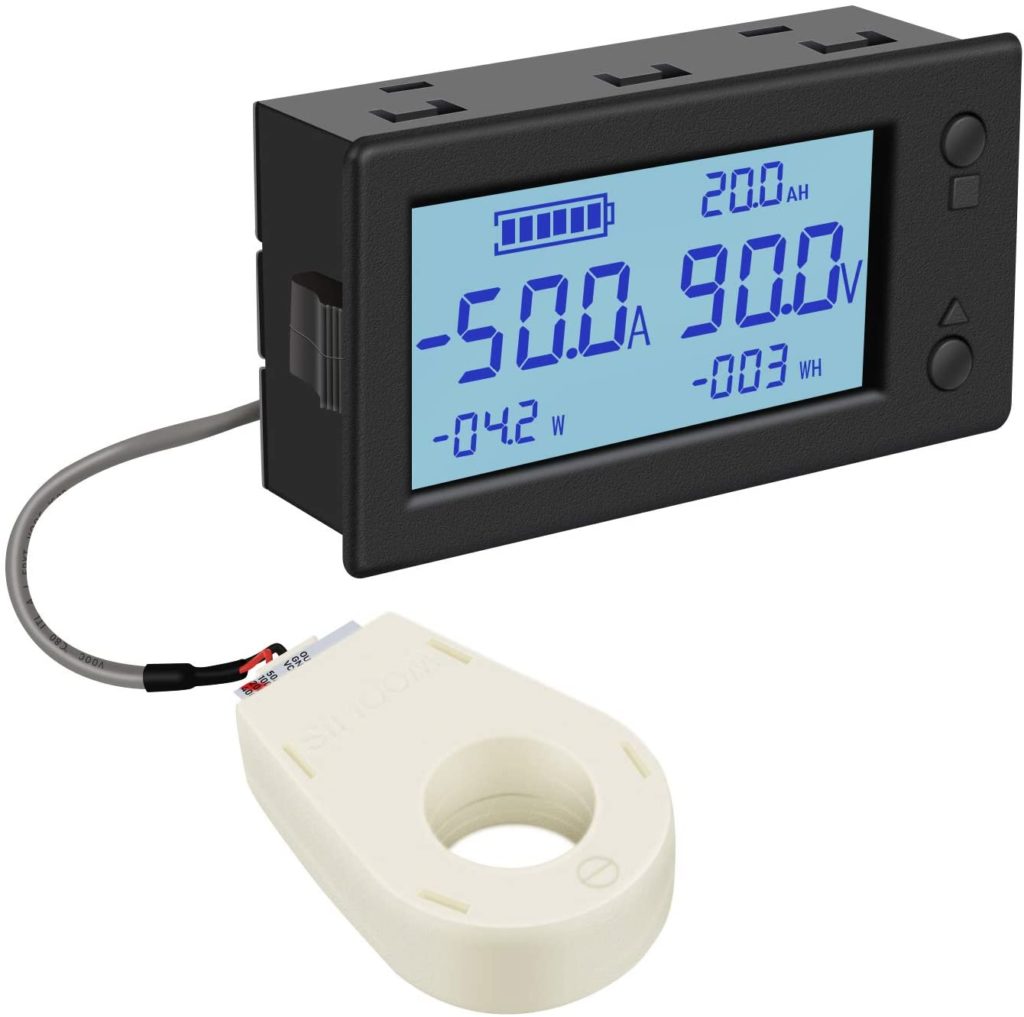
- Bombardment Meter (OPTIONAL):
The one used for this build is the DROK battery meter with on/off and Battery Temp Sensor.
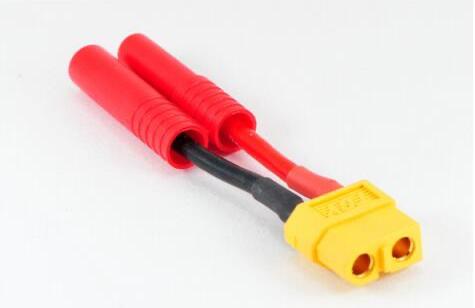
- Connectors:
4mm bullet & XT 60 connectors. The Focbox Unity has these pre-soldered and attached on their ESC. So no soldering will be required. However, some ESCs such as the ones from Flipsky will crave soldering connectors to attach to motors. For All Terrain electric skateboards, you may want to go to the larger 5mm bullet connectors to the motors and larger XT 90 connectors for ability connections.
- Some Add-Ons:
- Scroll – Conduit to continue motor wires organized. Lots of cool options to wearing apparel upwardly your ride and keep your wires and connections clean.
- Curl – 2 inch wide Velcro.
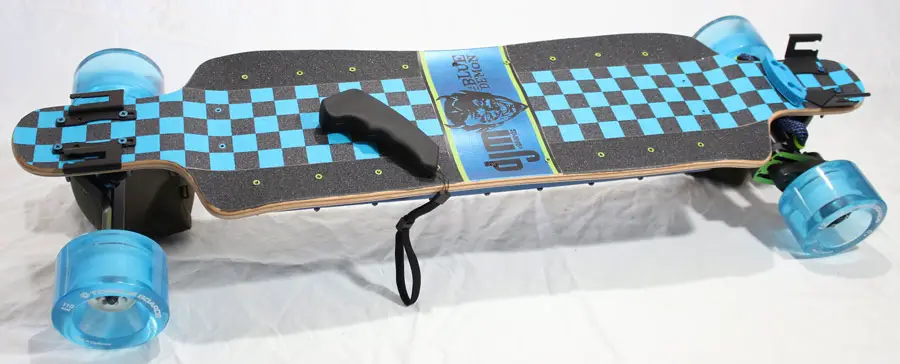
- Roll – Longboard grip record or grip material for the top of the deck. Let your creativity shine! You can too use the spray grip tape or the epoxy and fine footing sand/glass method. Whatsoever works, equally long every bit you tin can stay on your skateboard.
- Seal material for the seal between the enclosure and the skateboard deck. The Mboards Forty enclosure includes a neoprene gasket with its kit, but some good options for other enclosures are yoga mats, thin neoprene foam from the hobby shop, window foam seal strip, and safe window seal. This helps continue vibrations to your electronics down and helps keep out grit and water from the occasional splash (non waterproof).
Let'southward Get Started! Permit'south build an electric skateboard
Step One
Prep Your Board.
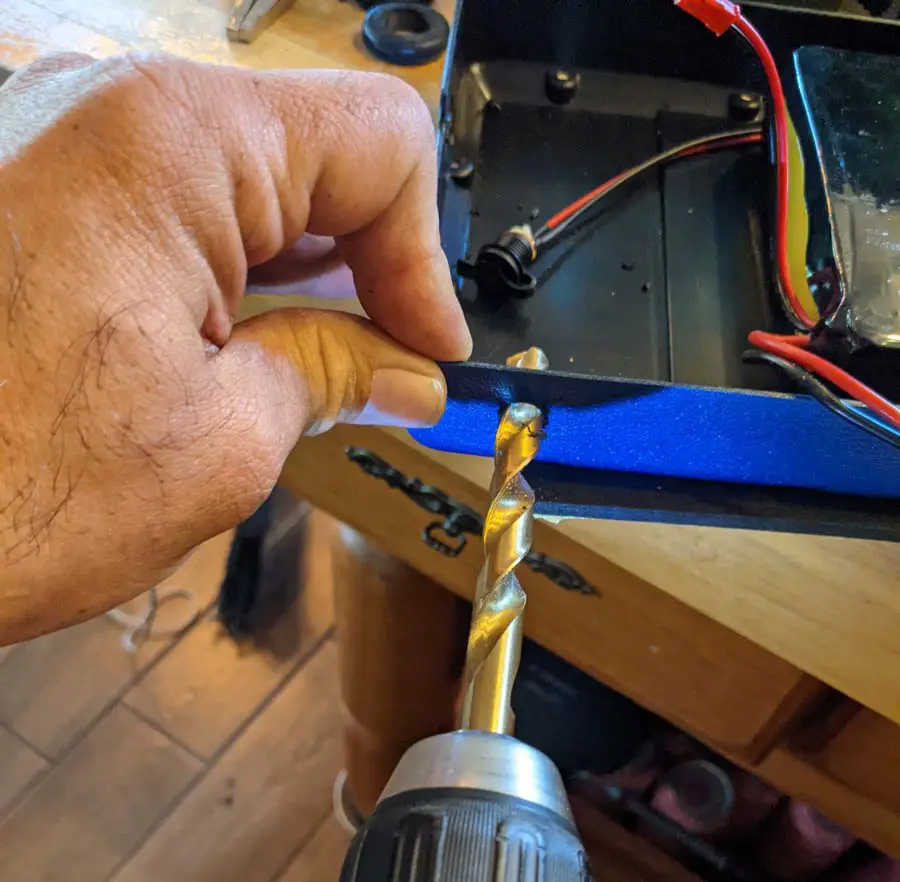
Pre-drill the holes for your enclosure and brand sure you accept clearance for the motors, mounts, and electronics. This is where you will want to decorate your skateboard. If you paint your board, let information technology dry out for a few days before building. You tin can paint your enclosure at this fourth dimension every bit well if you desire. Both will need at to the lowest degree 3 days to dry. You can also vinyl wrap your board and enclosure. The sky is the limit.
When your pigment is dry out or other artistic endeavors satisfied, apply your grip tape and make certain it is fully applied with no bubbles before trimming. Re-drill your mounting holes for the trucks and the enclosure. When done, set bated.Cool Trick! Glue downward a layer of thin foam down earlier your grip tape for a more comfortable ride.
Stride Two
Prep Your Motors
Add the motor mounts on your rear truck. Insert the motors into the mounts and install the drive caster on the motor only continue the motor hand adjustable. Do the same for the other mount and motor.
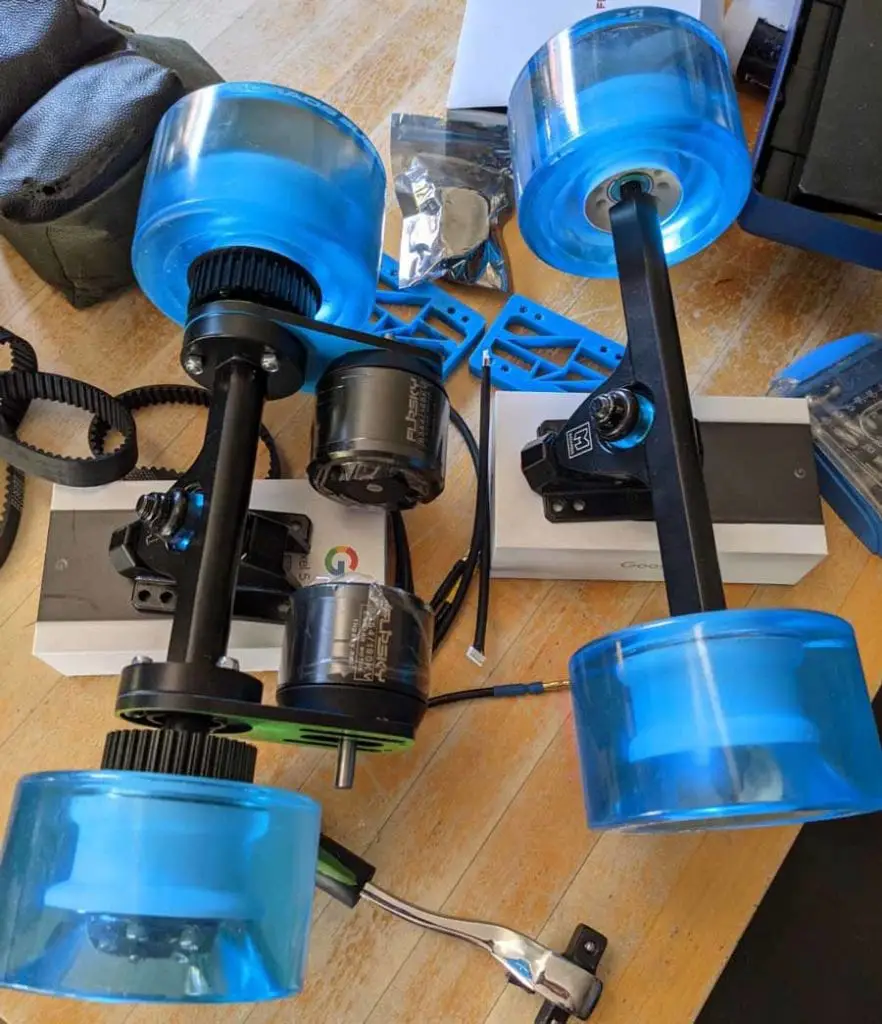
Make certain both motors spin freely and the drive pulley doesn't drag on the mount.
Add the wheel bearings two to a wheel. Press them into your wheels. A quick style to install the bearings in tight wheels is to put them on the trucks, adding the washers, and tightening the axle nut until the bearings seat themselves in the wheel. Repeat for all wheels and ready bated.
Install the Kegel pulleys to two of the wheels. Sometimes the pulleys snap correct in, sometimes they have to exist screwed in. If your bicycle pulleys come up with screws, use them. After mounting the pulleys to two of the wheels, mount those wheels to the trucks with the motors mounted and give them a spin. If y'all experience resistance, suit your motor mounts and see if you go the clearance you need. Depending on your wheel/pulley/truck philharmonic choice, you may have to grind some material off of the trucks to get the free motility you demand. This can happen and can exist normal. Merely have your time and take minor amounts of material off at a time.
Once you accept the wheels spinning freely, remove them, and apply the belts to the drive caster on the motor. Slide belt over the bicycle pulley equally you reinstall the wheel. At present you can adjust the belt tension by pulling on either the mount or the motor until the chugalug tightens. Y'all want loose enough for a little give, but tight enough the belt doesn't slip.
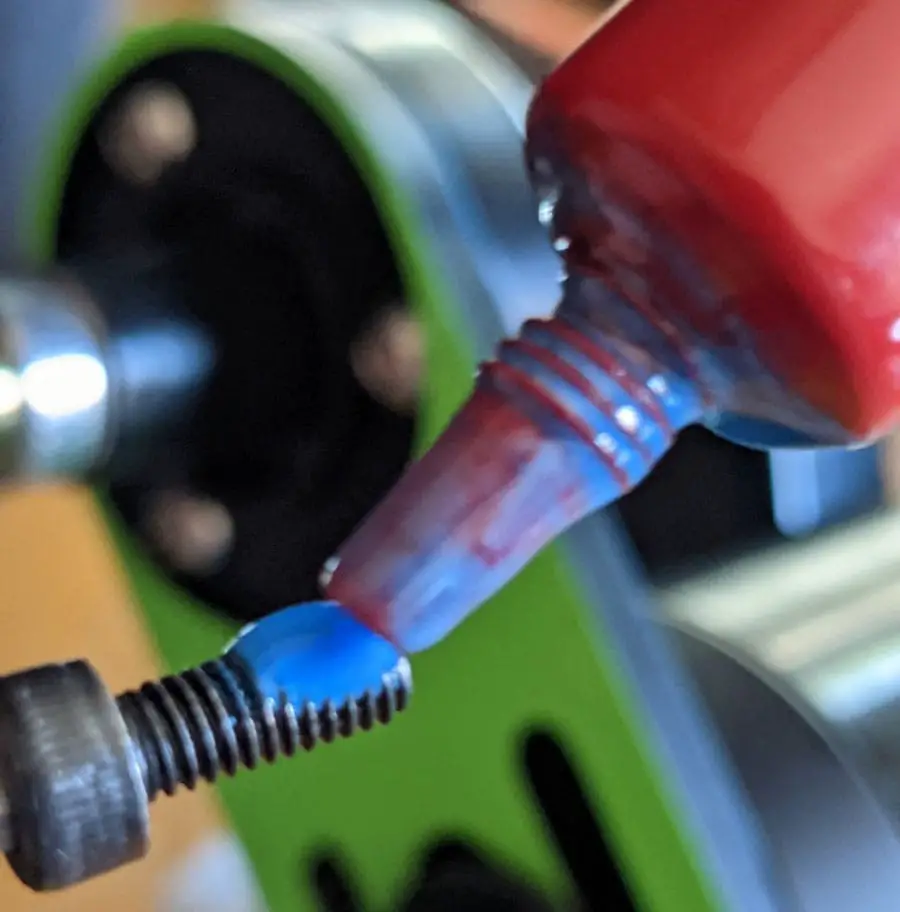
Tighten all the bolts on the mount and the motor. Check the tension again. If all is good, remove each bolt from the motor one at a time, apply thread locker (Similar Loctite) to each bolt, then reinstall and tightening. Do the aforementioned for whatever bolt that doesn't have a Nylon locking nut.
Repeat for the other motor setup.
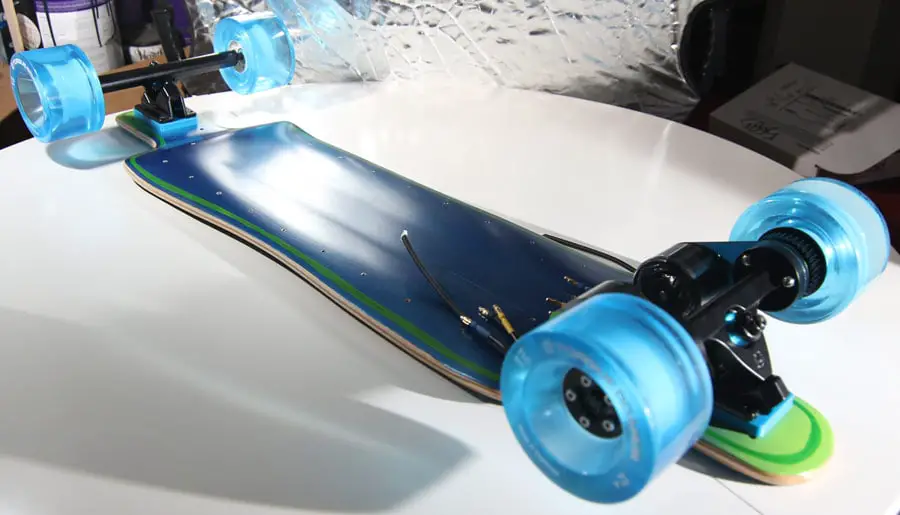
You should now take a complete drive setup with the wheels on and belts mounted. Mount the completed drive prepare on your skateboard. Add the wheels and bearing to your front truck and mount that too. Be sure to route the motor wires in a way you can accomplish the enclosure and not rub on annihilation that may impairment them.
Cool Trick: If you have bung screws or motors on your motor mounts that merely Will Not stay tight no thing what you practice. Wrap the commodities threads with Teflon record, before applying thread locker and reinstalling. It helps keep the bolts from vibrating loose.
Step Three
Build upwards the enclosure
Practice NOT Connect the battery until all electronics have been exam fitted and all parts are in place.
Examination fit the battery and ESC in the enclosure, and see how everything will fit. Brand sure none of the wires volition be kinking or rubbing on annihilation. Remove after plumbing fixtures.
Pre Drill holes for the ability switch and charger port.
Trim Velcro to fit your bombardment. Employ the soft side of Velcro to the battery and the claw side inside the enclosure. Re-mountain the battery. Do the same for the ESC. Cutting into strips for ESC, particularly if you are using an ESC with an exposed excursion board. Apply around the heat sink side. Re-mountain ESC.
At present battery and ESC are secure and shouldn't motility effectually likewise much. If yous invert the case, they should stay in place and non fall out.
Add power switch and thread in the charger port and wire.
Add in your receiver for your remote control. There are normally two styles, UART and PPM. UART has many wires and the PPM has only 3. Both will work fine. Just make sure you connect your receiver to the proper port for your chosen remote. Follow the wiring instructions that came with your ESC.
Add a small strip of Velcro to the receiver and find a place in your enclosure for the circuit board. Make certain the receiver antenna is not obstructed or kinked. If you take to add a Bluetooth adapter, add that at present and Velcro in identify. Connect to port on ESC.
Once mounted within the case, add a little drop of hot glue to ability switch threads and charger port to keep them from vibrating out of the enclosure when riding.
Connect the power switch to ESC, and connect the charger wire to the BMS wires of your battery.
If you lot have it, at present is the time to wire in your battery meter per its instructions. This may require soldering.
Put enclosure on the skateboard deck facing upwards so y'all see inside the enclosure.
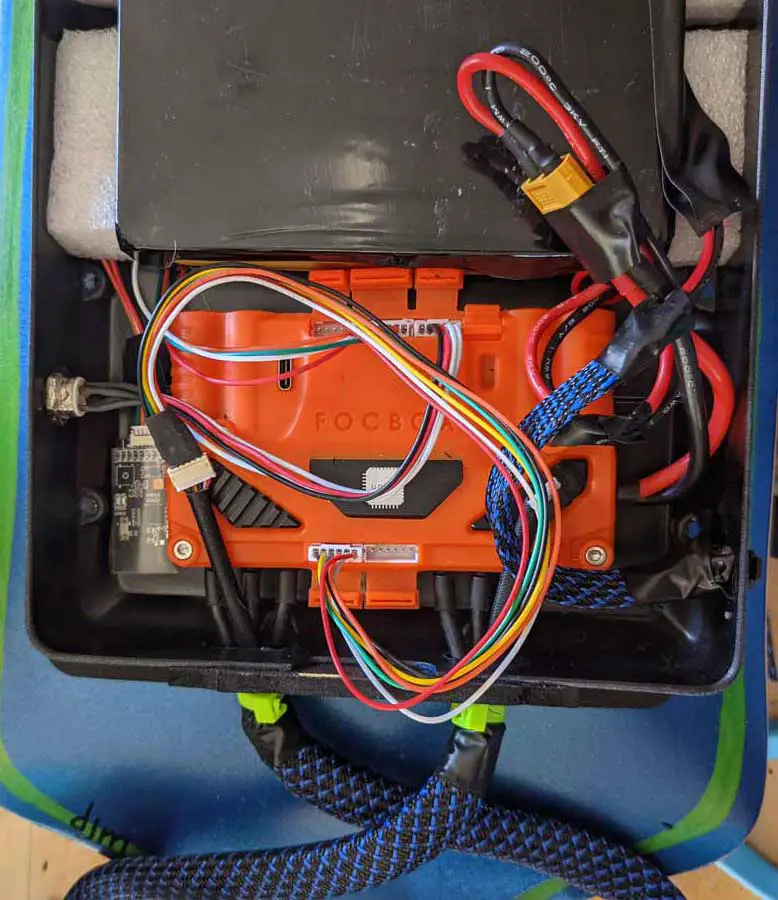
Take ane bunch of motor wires from i motor and cross them to the other side of the enclosure and connect to that side of the ESC past connecting the bullet connectors, don't worry about the order of the wires, they all work the same. Each motor also has a fix of wires chosen Hall Sensor wires. These tell the ESC the position of the motor at whatsoever betoken in fourth dimension and space. You want to add this to the wire grouping as you connect them. Be sure the Hall Sensor wires for a motor, plug into the same side of the ESC equally the wires for that called motor.
Catch the other set of motor and Hall sensor wires and as a group cross them over the other motor wires and connect to the other side of the ESC. Looking down, the wire bunches should form an X leading to the ESC with one ready of motor wires over the other.
Make certain the ability button is off. Now Connect the ESC and the Battery via the two XT 60 connectors.
Press the power switch. If the ESC powers on, the lights change color from red to blue, to green, Success! That ways you take connected everything correctly and are ready to setup. If the lights stay ruby or don't ability on at all, press the power switch, disconnect the power from the ESC and bank check all of your connections. Make certain the battery has a charge, and reconnect to the ESC. Troubleshoot your setup until yous have ability on and all green.
Turn off the power. You are at present ready to program your ESC, cease the concluding assembly, and go ride.
Absurd Pull a fast one on 1: Wanna get four×4? Simply connect two dual ESC via a CAN/BUS cablevision and you can now have four motors for super power! Just think to programme the ESC and then that the ii front wheels piece of work in the same direction as the rear wheels.
Cool Play a trick on ii: You can brand a security "Loop Key" for your skateboard by calculation an additional XT sixty or 90 connector between the battery and ESC. Only cut the positive wire and run the positive for the battery and positive for the ESC into each plug, in a single side of an XT connector. Take the other side of the XT connector and loop a piece of wire from ane side to the other. Now when you pull the "cardinal", you will finer cut all power to the lath. This used to be used as an Anti Spark connector, but nearly newer ESCs have anti spark engineering science built in and then this now serves more equally a inexpensive security feature.
Step Iv
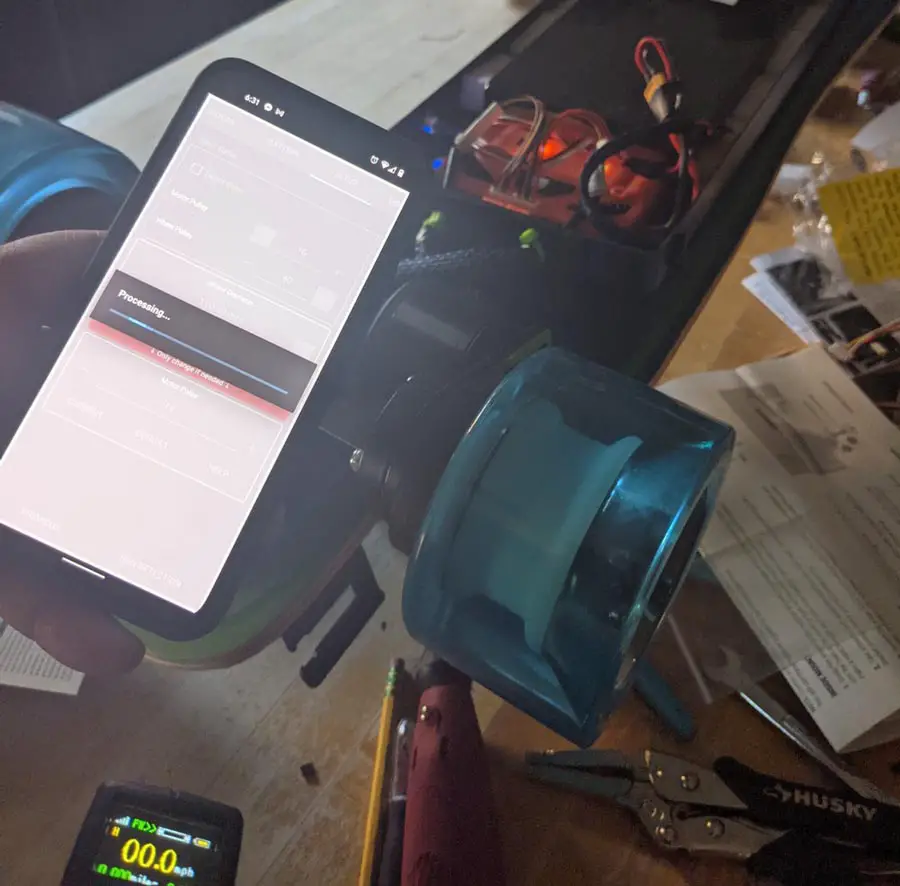
Programming and Running your electrical skateboard for the get-go fourth dimension.
Download the VESC Tool software on your laptop. Or you can exist a proud donator to the cause and spend the 99 cents to download the VESC Tool app to your smartphone. Connect your laptop via the included USB to micro USB cord. I gear up most electric skateboards using my smartphone and the Bluetooth connection. So this setup is done using that method.
Power on your skateboard and expect for all the lights to get dark-green or blue. Make sure there are no obstructions around the wheels of the drive system, and the belts are connected and tensioned.
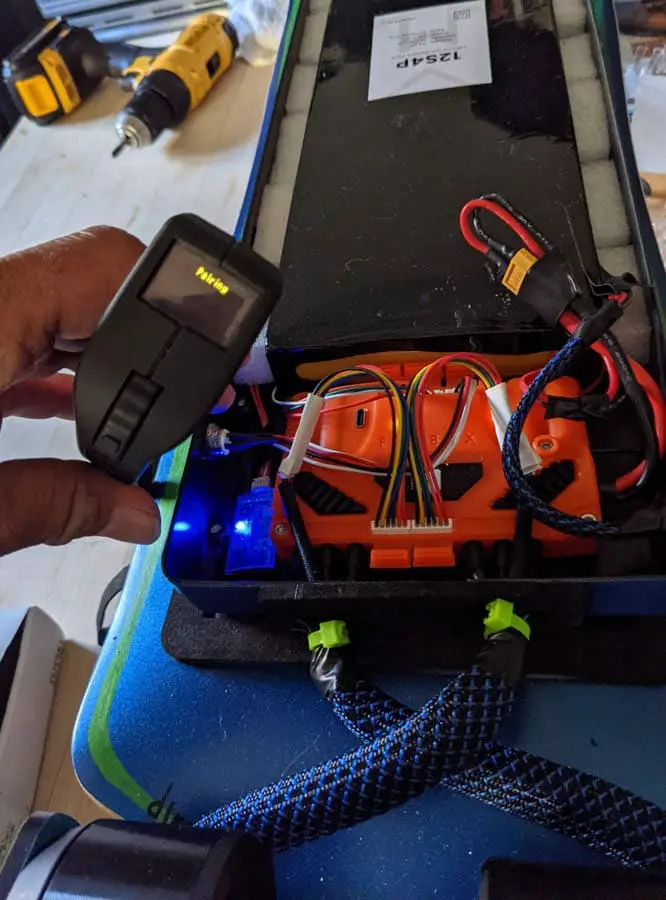
Open the VESC Tool app on your phone and SCAN for your ESC. When it finds the ESC hit PAIR
Now use the Configuration Wizards to setup
MOTORS (FOC)
INPUT
When the wizard for MOTORS start you lot will hear a loftier pitched sound from your motors, this is normal. And adept news! Information technology means your ESC is working and reading the motors. The motors will spin up in power and move forward and backward. Information technology volition do this for both motors. When done, the magician will testify you the motors and yous volition be asked to choose the drive management. If the motor doesn't run in the right direction, choose INVERT and hit OK. The motors should now spin the correct way. Click OK and exit the motor sorcerer.
Enter the input Wizard and fix the style of remote you are using. Most will be UART or PPM. Whichever way you lot connected to your ESC is the way of input yous choose. Setup your battery info and other info. And then as the wizard continues, it will ask questions to assist you suit throttle etc. Once you hit your throttle, your wheels should start spinning. If simply ane wheel spins, don't worry. The motors work better when under load. So if the throttle connects and works, you are skilful to go. Just make certain that when you lot press the throttle, a wheel or wheels spin upwards.
While programming an ESC can get complicated, for the most part, you are washed with basic VESC programming and are ready to finish assembly and go have a examination ride. I know I am missing a few things, but on initial setup, the ESC and VESC Tool will setup to defaults which volition piece of work fine for initial testing. You lot don't demand to make any additional adjustments later setting up motors and controller. You tin tweak everything else after your first ride.
NOTE: Please do some inquiry earlier diving also deep into the VESC software. Know that every DIY builder likes to customize their electric skateboards to their riding style, and adjusting your ESC using VESC Tool volition allow yous well-nigh limitless adjustment. So have your fourth dimension, research, and tweak your skateboard in baby steps as y'all ride and evolve.
Turn off the power, flip the example over and fasten the enclosure to the skateboard.
The crossed motor wires should now be in line with its side of the enclosure. Make sure there are no pinched wires. Wrap the motor and hall sensor wires with conduit only to go on them organized and clean. Everything should now exist secure. Tape, nix necktie, or otherwise secure the conduit.
Fully Charge your skateboard and remote command batteries before your first ride.
You are now ready to examination your new electric skateboard.
Step Five
Your Kickoff Ride
Motorbike Proverb: Apparel for the Crash, non the ride.

If y'all accept never ridden a skateboard or think you may be able to ride a 30mph plus skateboard with no protection, please accept the time to read this article, https://east-skateboarder.com/all-time-protective-and-rubber-gear/
Find a large safe area.
Power On Your Lath, then your remote control in that order.
Lift the drivetrain side of your skateboard and requite the throttle a quick pull. Your wheels should spin up.
Grinning. You did information technology.
Stand on the board, lean forward on your correct foot, and ease the throttle. You will start to move forward.
TEST It!
– As y'all ride, get a experience for the lath. If you experience wobbly, tighten the trucks until you lot feel more than stable but not and then tight you can't plough. Notice your speed wobble bespeak. That'south the point in speed where your skateboard trucks tin't keep upwards with the speed or your constant correction and you begin to lose control and balance. Keep adjusting your trucks to friction match your current speed comfort level. The faster you go, the tighter the trucks need to be. So you will start to lose turning power and carving ability in favor of speed. As well, the bushings will continue to break in requiring boosted adjustments. Check out this article https://e-skateboarder.com/bushings to larn more about how your bushings' durability affects your ride.
– Hit the throttle, cheque the throttle response. Your throttle should exist snappy. Yous can tweak in the INPUT Section of the VESC Tool
– Let off the throttle at speed, watch the remote for battery response. It should show a modest regeneration charge every time you let off the throttle. If you don't get enough regeneration, you can brand those adjustments in VESC Tool. Too much regen and your board volition suffer, so use sparingly.
Cool Play a trick on: You can actually track your speed and monitor all of your ESC systems if using the VESC Tool App on your phone while riding. It can monitor an entire ride session and provide you with real time data.
Go have fun
I hope you enjoyed this build. I know I did.
Please check out https://e-skateboarder.com for many more articles on this hot new sport/hobby/PEV vehicle.

How To Remove Skateboard Grip Tape,
Source: https://e-skateboarder.com/electric-skateboard-diy/
Posted by: finneymyseat.blogspot.com
0 Response to "How To Remove Skateboard Grip Tape"
Post a Comment