

How To Remove Blur From Image
Ever wish you could erase the groundwork of your photo with a click? Good news for you and then: BeFunky's Background Remover makes that (and more!) totally possible! Congenital entirely by our in-firm squad, the Background Remover uses A.I. to automatically discover the main subject in your image and remove the background behind it. And since this amazing engineering science is integrated with and so many of BeFunky's other photo editing tools and effects, it makes selective photo editing a breeze too. We'll show you lot how it works, plus a few of our favorite ways to get creative with this groundbreaking characteristic.
1-Click Background Remover Tutorial
First, let's acquire some background removal magic. Caput to BeFunky's Photo Editor and follow the steps beneath:
Step 1: Upload a Photo
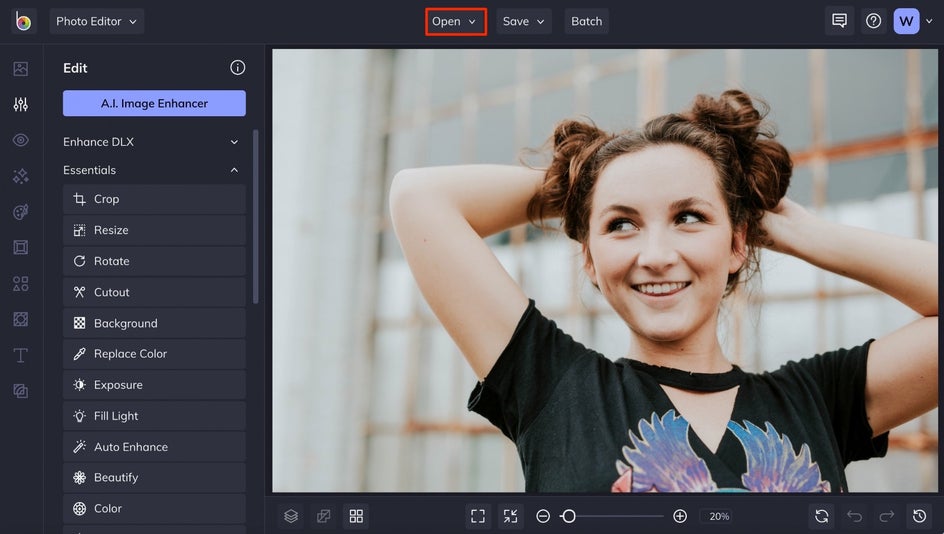
Later y'all click this link, you'll be directed to BeFunky'southward Photograph Editor. Click the Open tab at the height of the page to upload a photograph. Images with a clearly defined subject work best with the automatic Groundwork Remover.
Footstep 2: Open the Cutout Tool
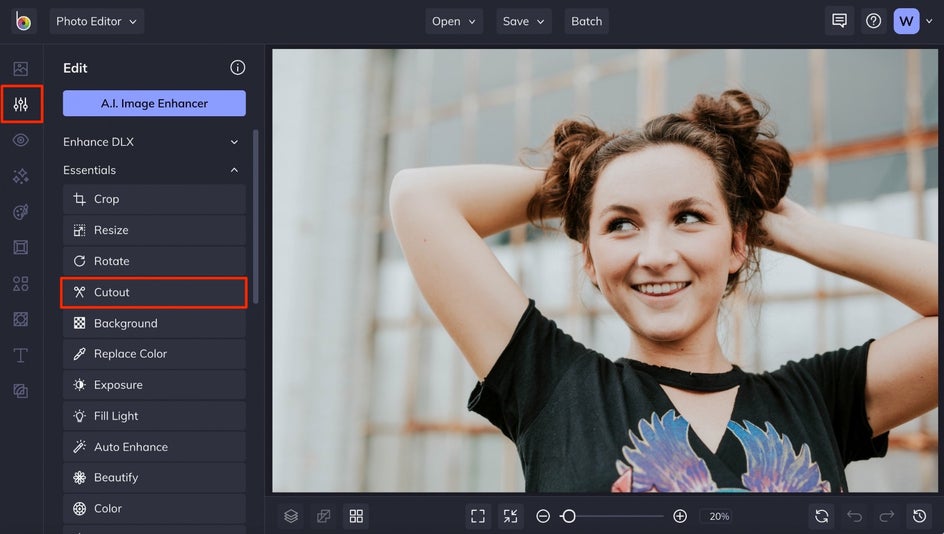
In the Edit card on the left, select the Cutout tool. This handy tool has everything you need to cutting out objects from your photograph and remove backgrounds with ease.
Step 3: Remove Background
Click the Remove Groundwork button. The Groundwork Remover will then aim to observe the chief field of study in your photo and erase the background behind it.
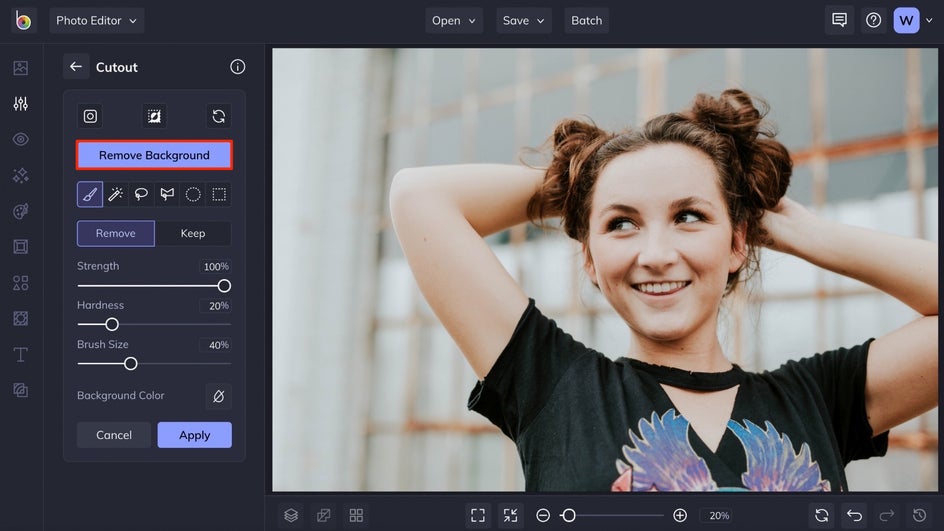
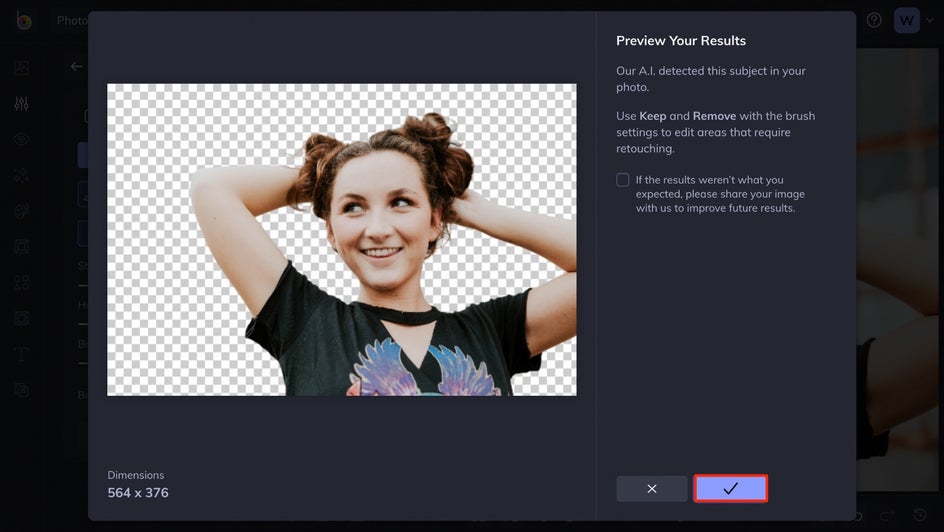
You'll see a preview of your epitome with the groundwork removed. If it looks perfect, click the bluish checkmark. If your image could nonetheless use more erasing, click the bluish checkmark then use the Cutout tool brushes to continue removing the background manually.
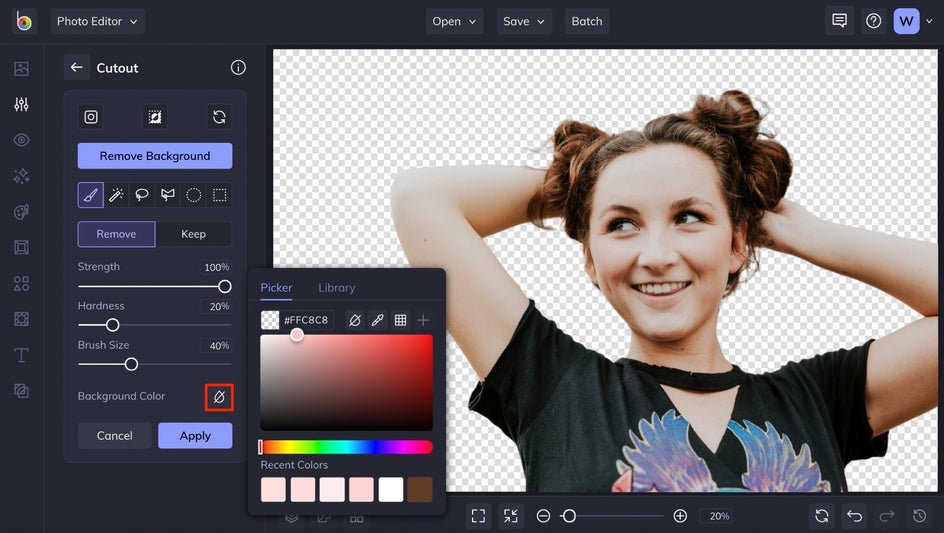
Stride 4: Choose Your Options
Any removed area of your image volition expect like a checkerboard, which means it's transparent. If you wish to replace the groundwork with a solid color, click the box side by side to Background Color in the Cutout tool menu and select a new hue. To keep it transparent, make sure that the No Color option is selected.
When your groundwork has been removed and replaced to your liking, click Apply in the Cutout tool carte du jour. This will bring upwards a Cutout Options menu for you to brand a few more than selections. Choose Trim Transparency if you want to trim whatsoever excess areas that have been removed around your subject. Choose Consign as Layer if you want to brand this cutout a brand new layer that will be additionally saved to the Image Director.
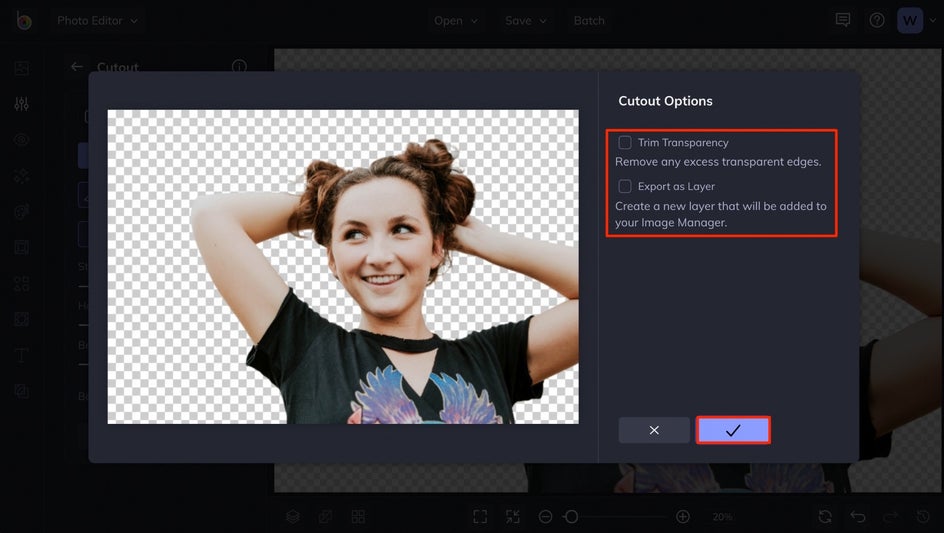
Afterward selecting your Cutout Options, click the blue checkmark.
Step 5: Save as a PNG
At present that you've successfully removed the background with BeFunky's Background Remover, you tin can go along editing as much as you'd like. When you're prepare to save, click the Save button at the top of the page.
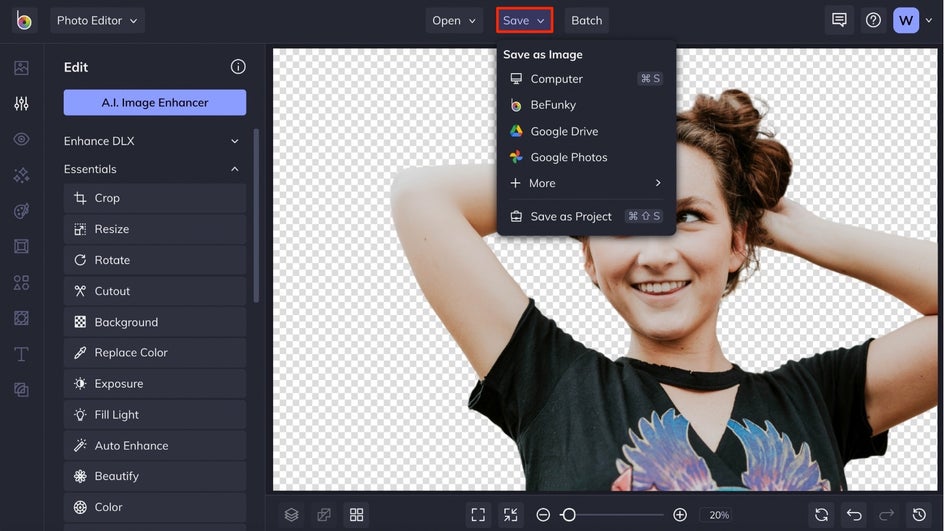
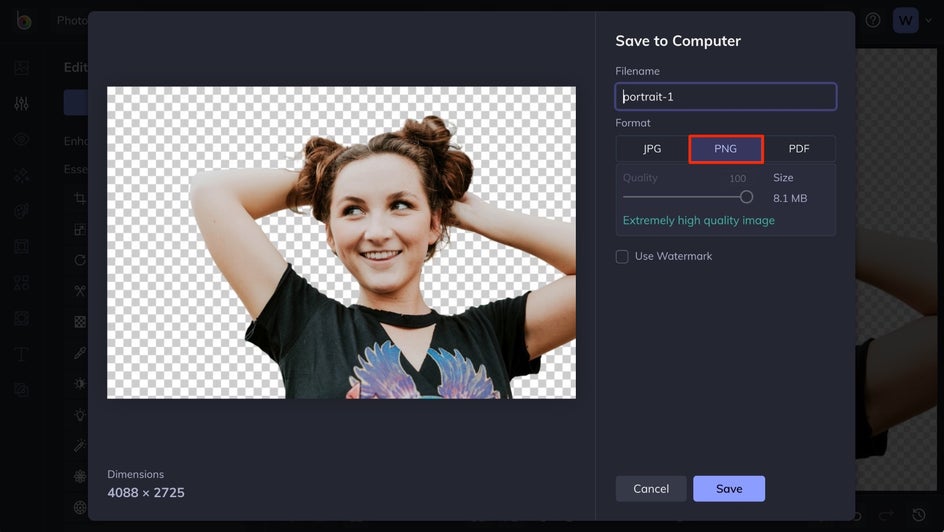
You'll exist presented with many different formats for saving your piece of work. To go on the background transparent, information technology's important to choose the Computer pick and select PNG format. Other formats will end up saving the background as plain white instead of transparent.
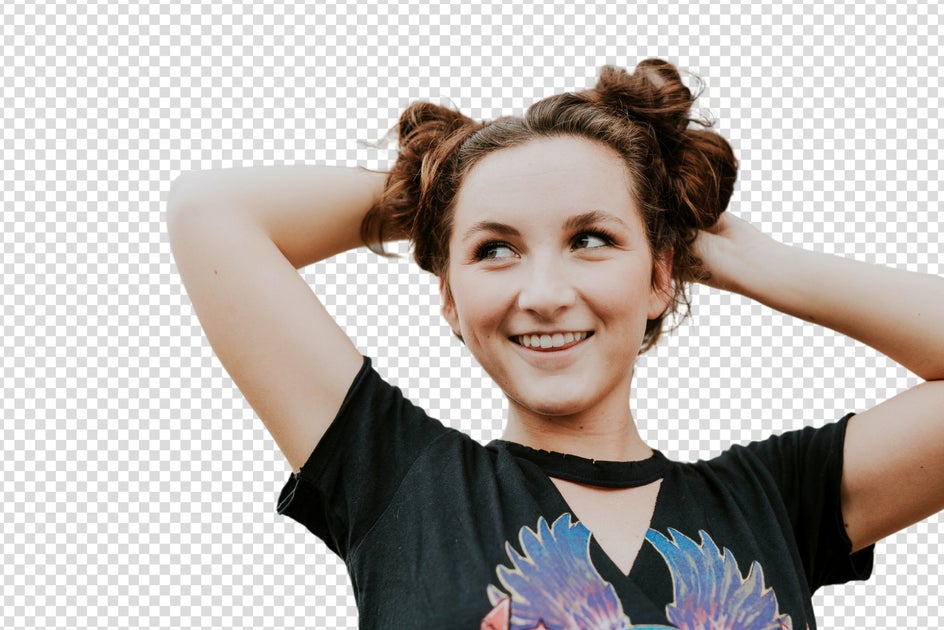
Background Remover Results
And voila – removing photo backgrounds has never been this like shooting fish in a barrel!
Keep in mind that BeFunky'south automatic Background Remover works best on photography that has a clearly divers field of study for the A.I. to detect, but if your paradigm needs a little more work there are enough of Cutout tools to help you remove the residual of the background with ease.

Background Remover Inspiration
Whether you demand to erase or supercede your prototype background, the Background Remover is going to be your new go-to. Here are a few more than creative ways to utilize information technology:
Create Transparent Backgrounds
A transparent background is essential if yous're wanting to create cohesive product photography, website graphics, and logos that stand up out on whatsoever colour background.
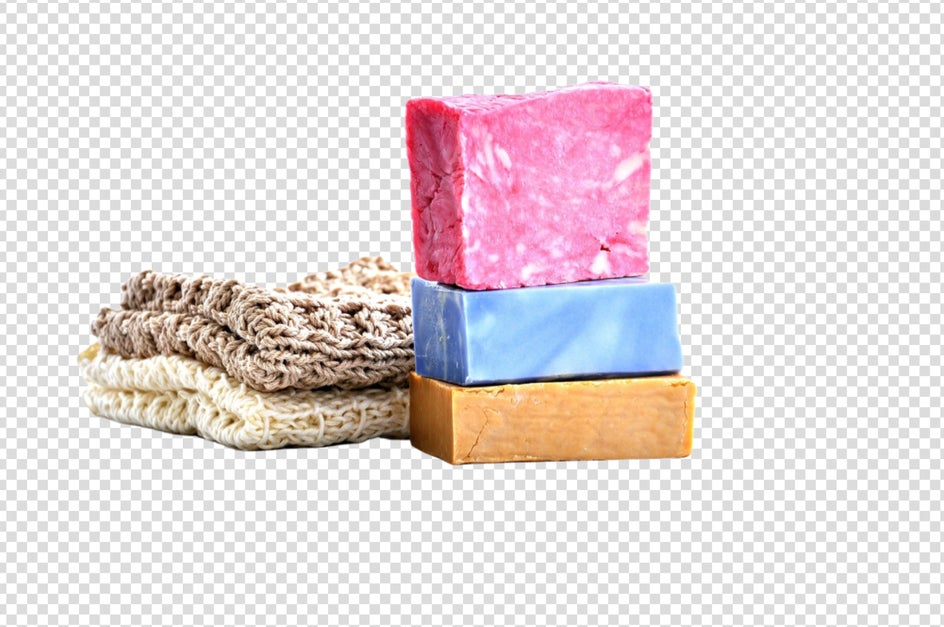
No matter what kind of photography you're working with, our Groundwork Remover works to discover the main subject area in your epitome and erase the background behind it, all in a click.
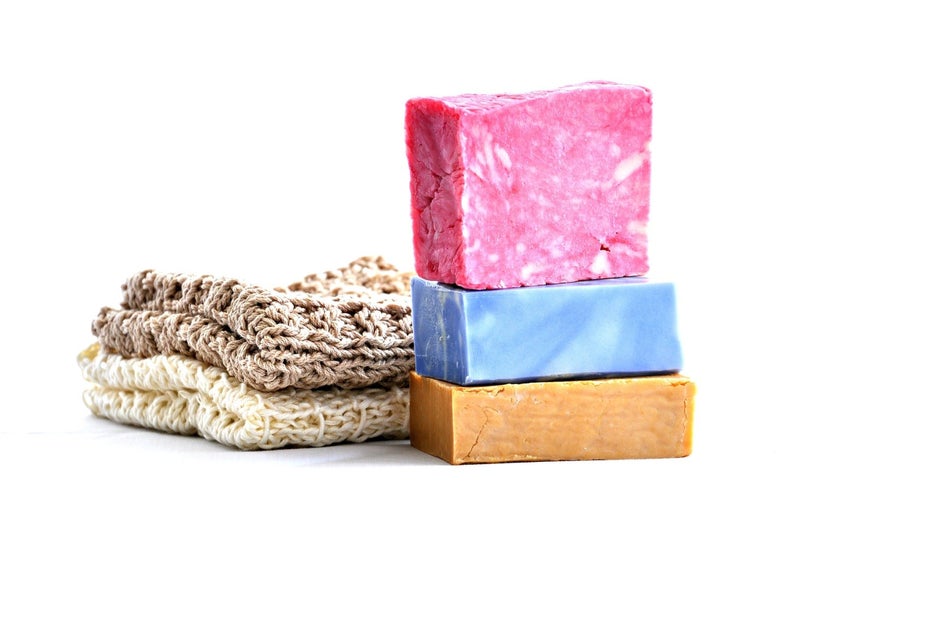
Create Solid-Colored Backgrounds
In some cases, adding a solid-colored background is the best way to make your main subject pop, especially when information technology comes to portraits and product photography.


With our Background Remover, yous accept your pick of any background color imaginable – even the ability to lucifer a color in your epitome. After removing the background in the Cutout tool, just select the Background Color menu and supercede the transparent background with a new hue.
Replace Backgrounds With New Scenes
1 of the not bad things about our Background Remover is that it's available to use on paradigm layers! This makes information technology easy to notice the perfect background, add an image layer on top, and so remove the background of the image layer to place your subject in a new scene.Perfect for creating memes and realistic-looking photo manipulations.


Isolate Subjects in Your Photos Tutorial
Remember how the Groundwork Remover uses A.I. to detect the main subject field in your prototype? This amazing technology is too available to apply with most of our photo editing tools and effects (including Artsy)! Any photograph editing tool, outcome, and texture in BeFunky'southward Photo Editor that has an Erase way which features an intuitive Isolate Subject button. With one click, you lot can easily apply edits selectively to simply the background or merely the subject.
To try information technology out, caput to the Photograph Editor and follow the steps below:
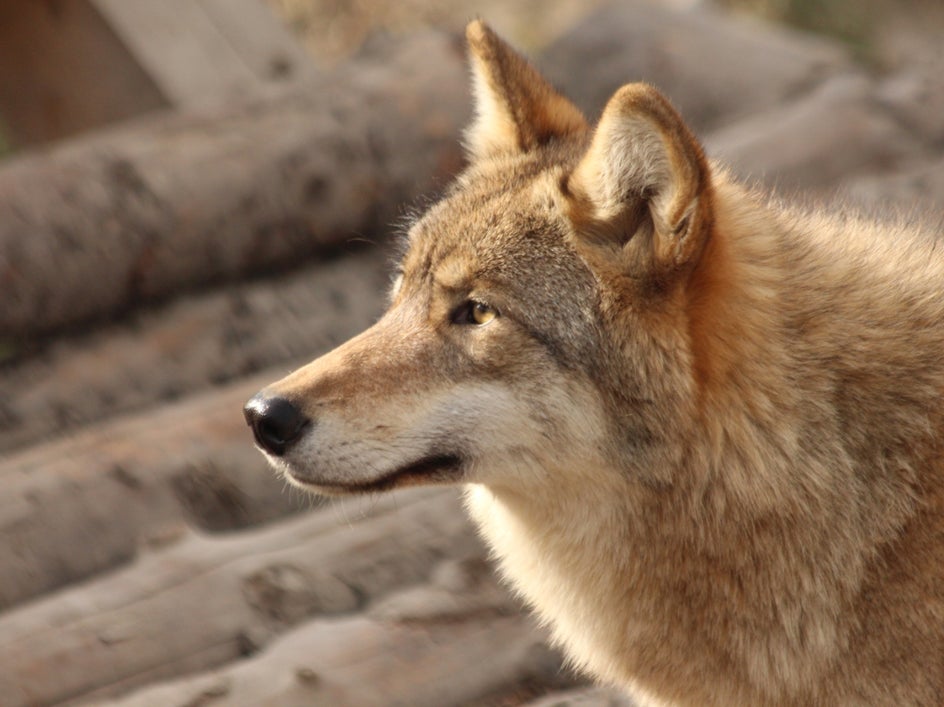
Pace 1: Upload a Photo
When yous click this link, you'll be directed to BeFunky's Photo Editor. Click the Open button at the top of the folio and upload a photo. An paradigm with a conspicuously defined subject will work best.

Step 2: Choose an Issue
Nearly of BeFunky'due south photo editing tools, Effects, and Textures let y'all to isolate the subject in your image for selective editing. We'll be showing you how it works with ane of our Textures for this tutorial, but the steps for isolating your subject with other tools volition exist the same regardless.
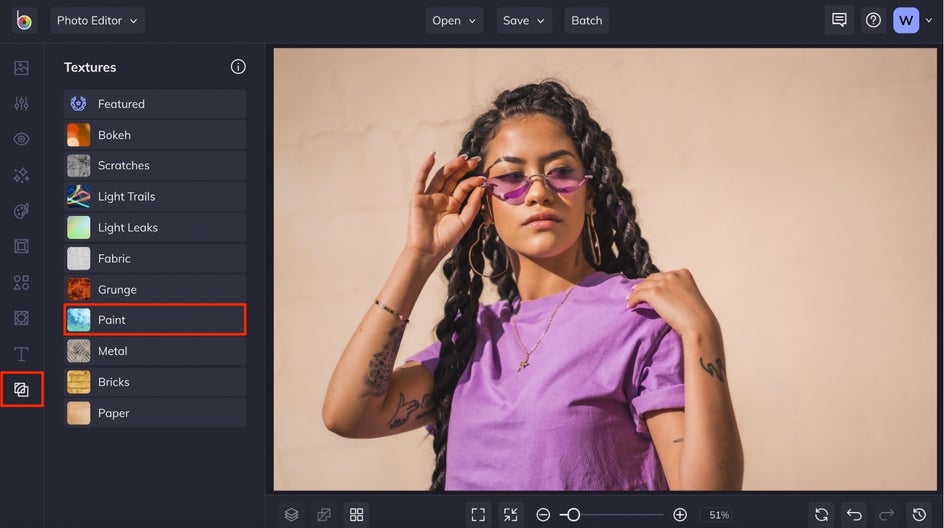
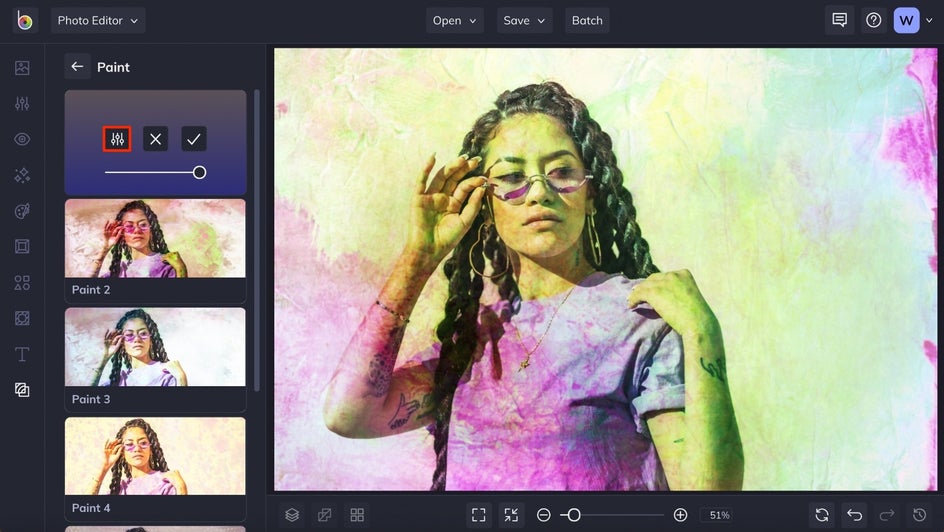
Open the Textures tab in the main card on the left. And so, scan the dissimilar Texture categories to preview the effects and see what looks best on your image. We've selected the Paint category for this photograph.
Footstep 3: Isolate Subject
Click on the Settings card located on the Texture thumbnail.
Cull the Erase tab, then click the Isolate Subject button.
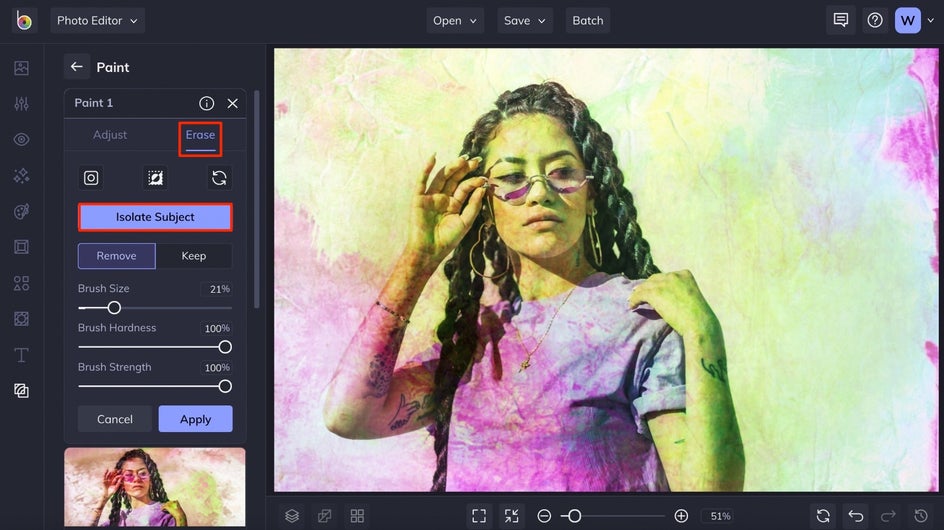
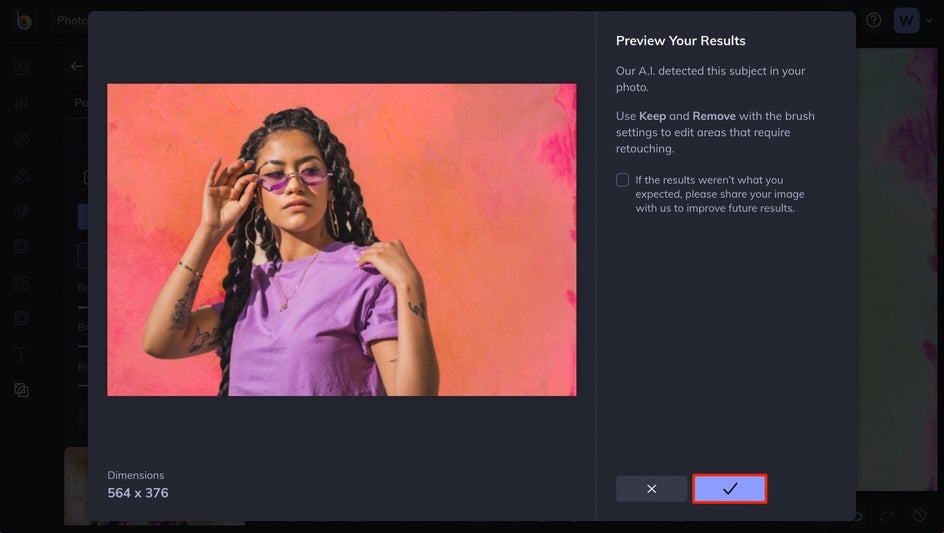
A preview will appear to show you the subject our A.I. detected with the background masked in red. If areas in the preview need to be touched upwardly, you tin always utilize the Proceed and Remove buttons in the Erase tab after clicking the blue checkmark to confirm.
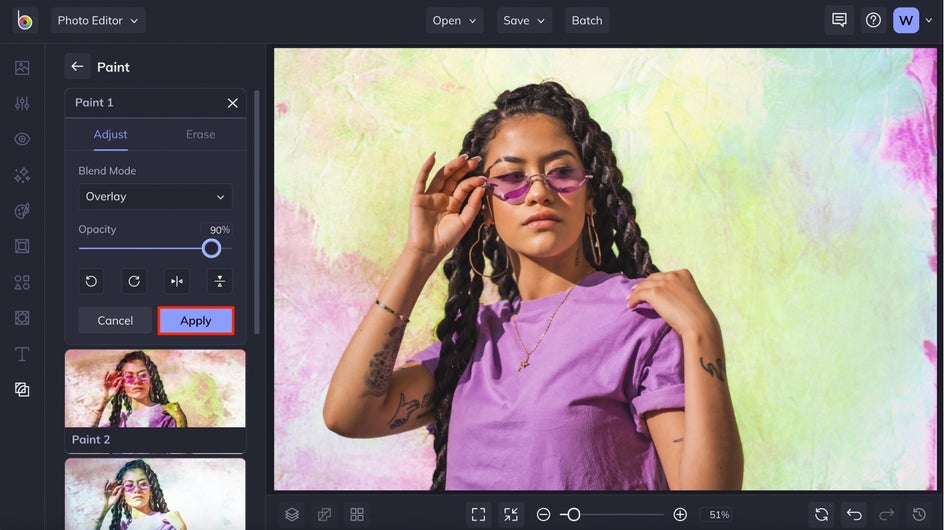
In one case your subject has been isolated, you can employ the Invert Option button to utilise the edits to only the subject or only the background. Y'all can also navigate back to the Adjust tab and feel costless to play around with the dissimilar settings to get the look you're after. When it looks but the way you lot want it to, click Apply.
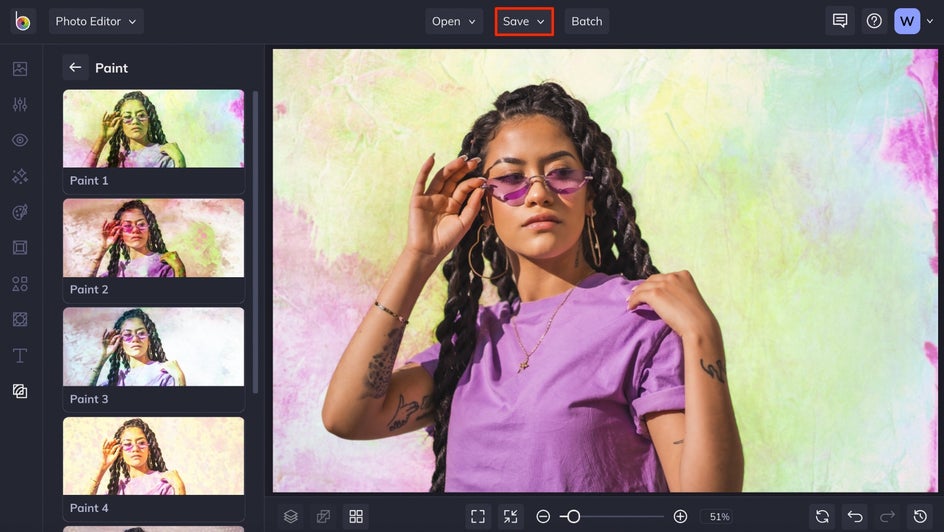
Pace 4: Salvage Your Epitome
When you're ready to relieve, click the Save button at the height of the page. You'll exist presented with many dissimilar formats for saving your work.
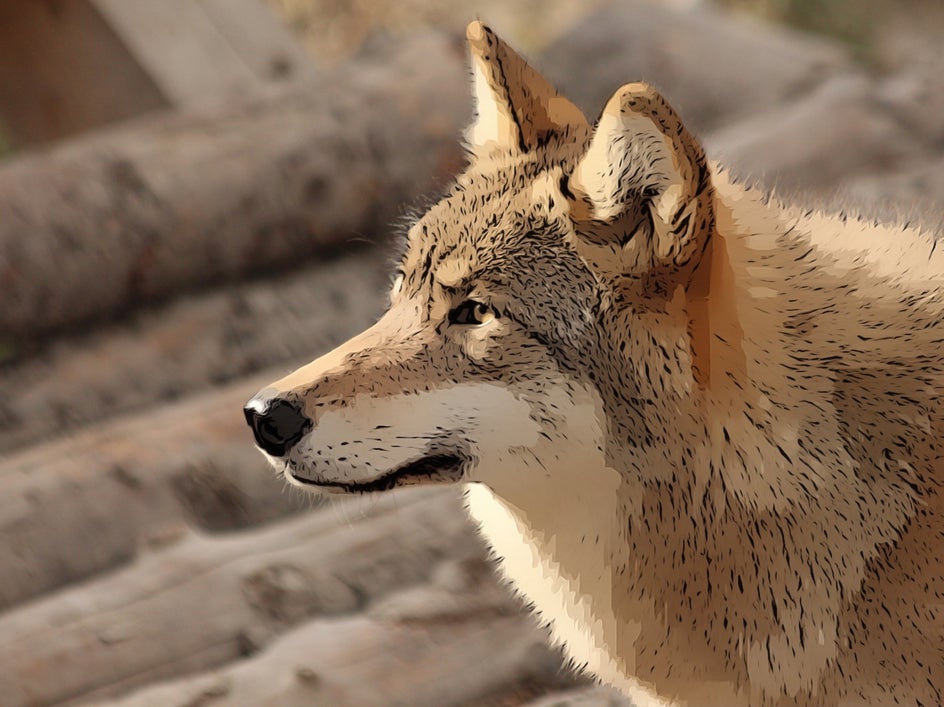
Isolate Subject Results
Doesn't this painterly background make the bailiwick in this photograph pop? The power to isolate subjects in BeFunky gives you lot more control over your photo editing than ever before.


Isolate Subject area Inspiration
Are yous blown abroad all the same? There's even more to testify you lot. Here are some more artistic ways to use Isolate Subject:
Blur Backgrounds With Ease
The collection of blur tools in our Edit card are essential for creating realistic-looking depth of field and tin can even mimic the look of an expensive camera. Using the Isolate Subject feature with a tool like Lens Blur can transform your prototype groundwork into something more intriguing, allowing your subject to stand out.


Go Creative With Cocked Effects
At present that y'all tin isolate subjects, you're able to use whatsoever Artsy consequence on either the subject or the background in your image! This fashion, yous tin can create an astonishing mixed media look with your photos, and more than.
Apply Photograph Furnishings Where You Want
In the Effects tab, at that place are so many fun filters and photograph effects you lot can now add together selectively to your images. For case, go along your subject looking ultra-colorful while adding a Black & White result to the background only.


Edit Backgrounds Easier Than Always
The ability to remove backgrounds and isolate subjects in a single click opens up a whole new world of photo editing possibilities! We tin't wait to run across how these new features make your photo editing sessions more than quick and precise. Get started with our Background Remover today.
Photo Editing, Simplified.

How To Remove Blur From Image,
Source: https://www.befunky.com/learn/automatic-background-remover/
Posted by: finneymyseat.blogspot.com
0 Response to "How To Remove Blur From Image"
Post a Comment